Graphite Purification Procedure
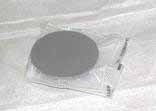
- Clean graphite foils and discs with ethanol and kimwipes
- Keep cleaned disks and foils protected with kimwipes at all times.
- Clean “fork” with ethanol and kimwipes, (should be underneath oven).

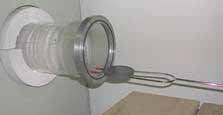
- Insert disks and foils into oven (maximum of 6).
- Make sure to alternate disks and foils; there should be 2 foils for every 1 disk.
- Place them close together but not touching, do NOT go too far into oven.
- Clean end cap with ethanol and kimwipes.
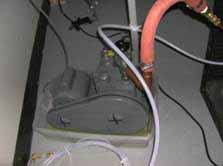
- Check mechanical pump for sufficient oil and if plugged in

- Be sure it smells and sounds like it is running properly.
- Make sure the end of the quartz tube is clean and apply a very small amount of vacuum grease to the O-Ring.
- Be sure ALL valves on ALL gas lines are closed.

- While one person is holding the end cap on the end of the quartz tube, another person should VERY slowly turn the valve labeled “pump” from closed to open.
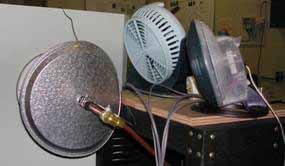
- Place mesh casing around quartz tube and thermometer in cable tie of end caps.

- Wait until the vacuum is well below 1000 millitorr on both thermocouple gauges.
-
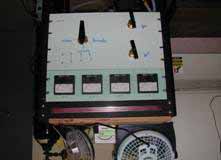
Turn the power switch on the oven to the on position.
- Wait until the temperature on all three displays appears.
- Hold in the blue buttons labeled “set” until “PrG” appears in red.
- Push the run button (down arrow) until “-1” appears in green.
- Press the set button until “SSP” appears in red (7 times), be sure desired temperature is set using arrow buttons.
-
Press the set button twice more until “En-1” appears, and set the desired run time in green using the arrows. This time should be at least 45 minutes longer than the actual bake-out time for that particular disk set. The oven’s timer begins when the oven starts to heat up, but we usually want to run for a particular time at exactly 1000°C.

- The optimal bake time is generally 1 hour.
- Hold the set button in until the temperature appears on the display again.
- Hold the run button in until the run light appears.
- Repeat b through h for all three displays.
- Make sure that a timer is set for the proper temperature once the oven reaches that desired temperature.
- Refresh on all fire safety precautions, (refer to poster on wall above computer).
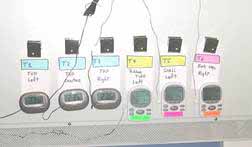
- Let oven run for desired time while monitoring thermometers and thermocouple gauges, (this is VERY important!!)
- External temperature readings should NOT exceed:
- Thermometers :
T1, T2, T3 à 70C

T4 (rubber tube) à 50C
T5 (glass)à 140C
T6 (end cap)à 70C
Thermocouples:
V1, V2à 1000millitorr
*If temperature or pressure exceeds limits contact student in charge and then Dr. Padalino immediately.
- When time is up, turn power switch off.
- Wait until the oven reaches room temperature (about 20°C). You can check the temperature of the oven simply by turning the power switch back on.)
- Remove temperature probe and mesh casing from end of quartz tube.
- While HOLDING end cap securely have someone turn “pump” valve from open to closed. (Remember end cap is heavy and may take time to pop off, be ready.)
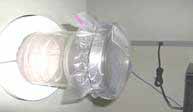
- Have large Ziploc bag and large O-ring ready (must be clean) to immediately cover quartz tube when end cap comes off.

- Turn large valve on Argon tank to “open.”
- Twist skinny bar tighter (this actually opens it).
- Open small black valve.
- Slowly open knob labeled “Ar” on front panel. The end cap should come off at this time.
- Be sure the Ziploc bag at end of quartz tube is on with O-ring and is slightly bulging so that you can feel the Argon pressure.
- Wait the specified amount of time for backfilling.
- The optimal bake time is generally 1 hour.
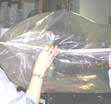
- When done backfilling attach glove bag to end of quartz tube using cable ties (glove bag must be previously prepared with hole to fit over tube end).

- Squeeze as much air as possible out of glove bag.
- Make sure the other end of the glove bag is sealed with plastic clasps.
- Turn Argon up slightly.
- From inside glove bag remove Ziploc bag and O-Ring, allow glove bag to fill up with Argon (about 2/3 full).

- Clean fork, aluminum clip and vacuum bags with ethanol and kimwipes.
- Create small hole in end of glove bag between plastic squeezers for fork and vacuum bags.
- Insert clean fork, aluminum clip and vacuum bags into glove bag (1 bag per disk set).
- Extract disks and insert into vacuum bags, all within the glove bag.
- (Disk sets consist of foil, disk, foil; stacked in that order.)
- Place circular holder on disk set completely so all the slack of the vacuum bag is at the back of the disk set.

- Clip the bag shut with the aluminum clip.
- Slide the clipped vacuum bag out of the small opening in the glove bag and IMMEDIATELY seal with the vacuum sealer.
- Remove circular holder and place in glove bag to be used for other disk sets.
- When all disks are removed along with foils and every bag is properly sealed, close all valves and turn off the oven.
- Remove the glove bag from the end and replace with large Ziploc bag and O-Ring again.
- Be sure each vacuum bag is properly labeled.

- Make Argon bubbles for each vacuum bag.
- Be sure each bubble is properly labeled.

